


Kiwanis Derby
Cart Decal Design
Fast Facts


Project Results
The design was used to decorate a cart on derby event day. Creating it gave me some valuable experience in large format print production, and added an eye catching cart to the Kiwanis Club's derby races.
Lessons learned
-
How to design vinyl decals for a 3D object
-
Creating designs that match preexisting branding
-
Practice creating designs for large format printing
Background
This was a decal I designed during my practicum at Leech Group in the spring of 2026. The decal was printed and installed on a derby cart for the Kiwanis Club of Brandon's 2026 annual go cart derby.
Brandon Crime Stoppers sponsored this cart, so I used some of their branding elements in the design, but aside from that I had complete creative freedom.
Software


Case Study

Overview
This was one of my favourite projects I worked on during my practicum at Leech Group in spring of 2026! It gave me the fun creative challenge of designing decals to decorate a go cart. The cart would be used in the Kiwanis Club of Brandon's 2026 go cart derby.
The cart was sponsored by Brandon Crime Stoppers, therefore it needed to include some of their branding elements. Aside from that I had complete creative freedom to decorate the cart however I wanted!
The Challenge
I had never made vinyl prints that would go on a 3D object before. While I had done a few vinyl designs that went on windows and tables, those were flat objects and therefore much simpler to work with. To ensure my design could be printed and installed correctly, I had to find a way to translate the dimensions of the cart into a 2D design from which the vinyl could be printed.
Design Process
1. Inspiration. To get some ideas, I went on to Pinterest and created a moodboard of vehicle decals. I looked at race cars, delivery vans, and everything in between.
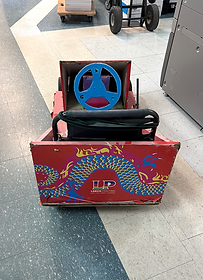
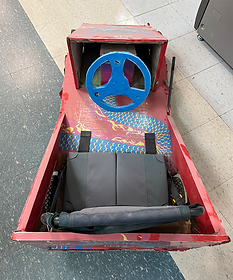
I also took measurements of the cart. It was super dusty, and had an old design on it.


2. Ideation. I sketched out a few ideas for the cart:
These first couple sketches were very rough. At first I was thinking of doing something with flames, for that speedy sports car look.

My next idea, which I ended up moving forward with, was stars. I find stars are flashy and fun, and they're somewhat reminiscent of a sheriff's star, which ties in to the idea of stopping crime.

2. Digitization. Using the measurements I'd taken earlier, I created a template in Adobe Illustrator to ensure my graphics would fit on the cart the way I intended.

Next I created digital graphics and added them to the template.

Using Adobe Photoshop, I created mockups of what the cart would look like once the graphics were printed.


The proofs were send to the client for review and were approved!
3. Print Preparation. I organized my digital graphics to be printed. This included adding the measurements to them, ensuring Leech's large format print operator knew how much vinyl they would need.

4. Installation. The design was printed and installed onto the cart.


Lessons Learned
-
How to design vinyl decals for a 3D object
-
Creating designs that match preexisting branding
-
Practice creating designs for large format printing